Transforming Your Bathroom with the Right Paint Colors

Bathrooms are often overlooked when it comes to interior design, but they are one of the most important rooms in our homes. It’s where we start and end our days, a space for relaxation and rejuvenation. One of the simplest yet most effective ways to transform your bathroom is by choosing the right paint colors. With the right hues, you can create a space that feels fresh, spacious, and inviting. In this guide, we’ll explore how to choose the perfect paint colors for your bathroom and transform it into a sanctuary you’ll love.

Consider the Size and Layout

Before selecting paint colors, take into account the size and layout of your bathroom. If it’s small or lacks natural light, opt for lighter shades that can help to open up the space and make it feel more airy. Conversely, if you have a large bathroom with ample natural light, you can experiment with darker, richer colors to create a cozy atmosphere.

Think About the Mood You Want to Create

The colors you choose for your bathroom can have a significant impact on the mood and ambiance of the space. Soft, soothing tones like pale blues, greens, or lavender can evoke a sense of tranquility and relaxation, perfect for unwinding after a long day. On the other hand, vibrant hues like bold oranges or yellows can add energy and excitement to your morning routine.

Consider the Existing Fixtures and Decor

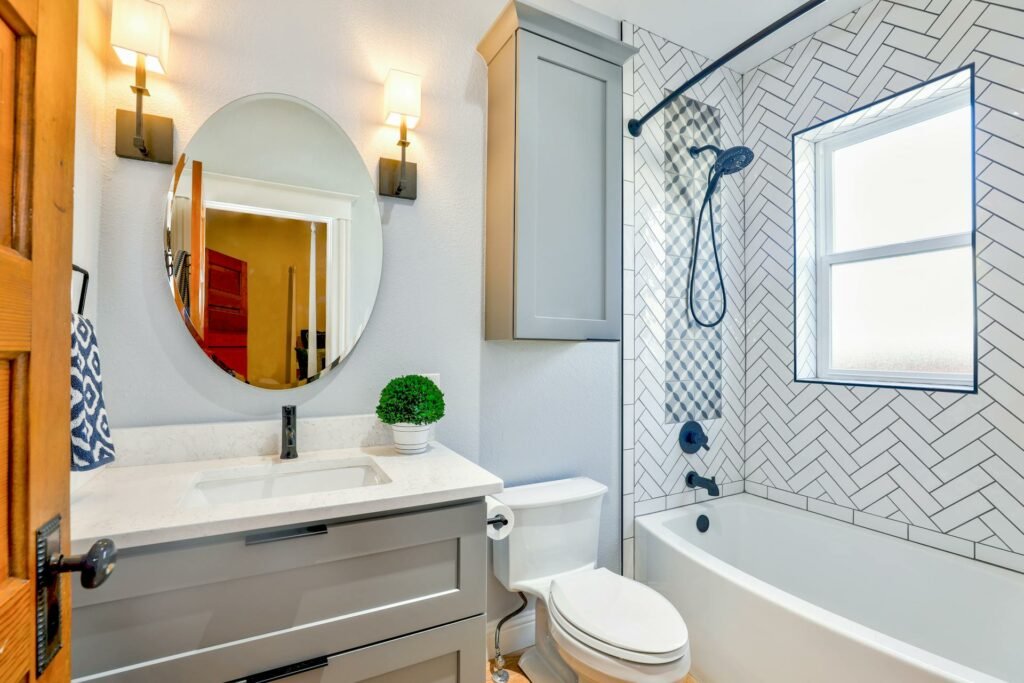
Take a look at your existing bathroom fixtures, such as the sink, bathtub, and tiles, as well as any decor elements like towels or shower curtains. Choose paint colors that complement these existing features to create a cohesive look and feel. For example, if you have classic white fixtures, you can’t go wrong with a neutral color palette. If you have colorful tiles or accessories, consider pulling out one of the accent colors for your walls.

Test Paint Samples

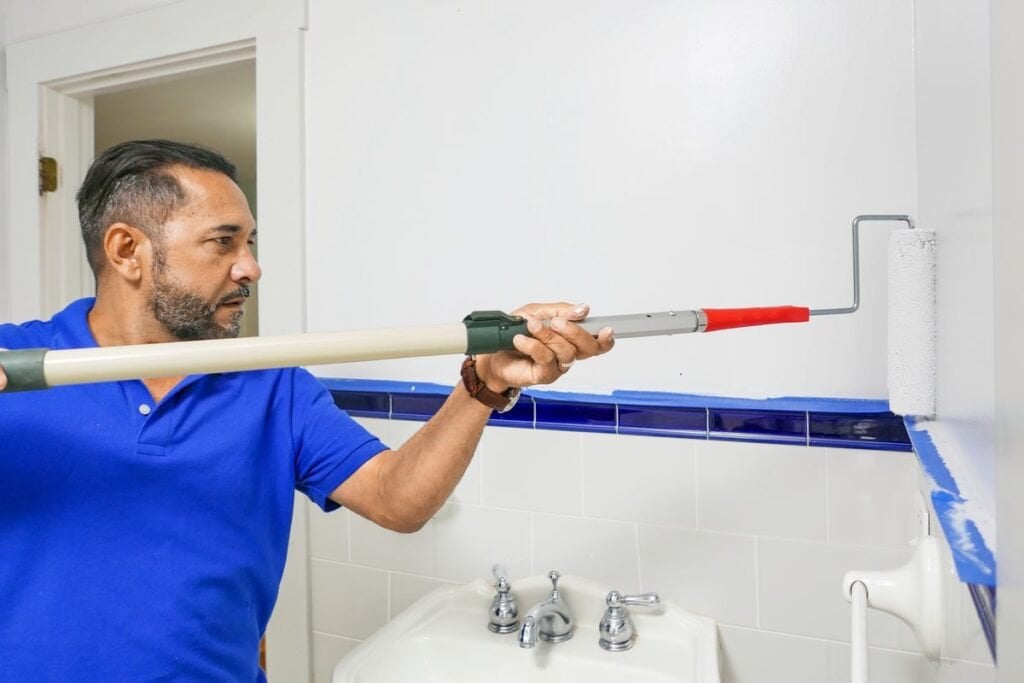
Before committing to a paint color, it’s essential to test out samples in your bathroom. Paint colors can look very different depending on the lighting and other elements in the room, so it’s crucial to see how they look in your space. Paint small sections of your walls with different colors and observe them throughout the day to see how they change in different lighting conditions.

Consider the Finish

In bathrooms, it’s essential to choose a paint finish that can withstand moisture and humidity. Opt for satin or semi-gloss finishes, which are durable and easy to clean. These finishes also reflect light, helping to brighten up the space and make it feel larger. Avoid flat or matte finishes, as they can trap moisture and are more prone to mold and mildew.

Create Contrast with Trim and Accents

Adding contrast to your bathroom can help to create visual interest and make the space feel more dynamic. Consider painting the trim, doors, or cabinets in a complementary or contrasting color to add depth and dimension to the room. You can also use accent colors on feature walls or in small doses to add pops of color without overwhelming the space.

Don’t Be Afraid to Go Bold

While neutral colors are always a safe choice, don’t be afraid to go bold and experiment with vibrant hues in your bathroom. Bold colors can add personality and drama to the space, making it feel more stylish and unique. Just be sure to balance bold colors with plenty of white or other neutral tones to prevent the room from feeling too overwhelming.

Consider the Overall Style of Your Home

Finally, consider the overall style of your home when choosing paint colors for your bathroom. While it’s essential to create a cohesive look throughout your home, bathrooms offer an opportunity to have a little fun and experiment with different colors and styles. Whether your home is traditional, modern, or eclectic, there are paint colors that can complement your aesthetic and enhance the overall design.

In conclusion, choosing the right paint colors can transform your bathroom from a functional space into a luxurious sanctuary. By considering factors such as size, layout, mood, existing fixtures, and overall style, you can select paint colors that reflect your personality and create a beautiful and inviting atmosphere. So don’t be afraid to get creative and experiment with different hues until you find the perfect combination for your bathroom makeover. With the right paint colors, you can turn your bathroom into a space you’ll love spending time in every day.

Painted Kitchen Cabinets: Budget-Friendly Ways to Update Your Space

Are your kitchen cabinets looking tired and outdated? Are you craving a fresh new look but worried about the cost of a full renovation? Fortunately, there’s a budget-friendly solution that can breathe new life into your kitchen: painting your cabinets. Painting kitchen cabinets is a cost-effective way to transform the heart of your home without breaking the bank. In this guide, we’ll explore the benefits of painted cabinets, step-by-step instructions for tackling the project yourself, and tips for achieving professional-looking results.

Why Paint Your Kitchen Cabinets?

Painting your kitchen cabinets offers numerous advantages beyond just saving money. Here are some compelling reasons to consider this budget-friendly upgrade:

Cost-Effective

Compared to replacing cabinets entirely, painting is a much more affordable option. It allows you to achieve a fresh, updated look for a fraction of the cost.

Endless Color Options

Paint provides endless possibilities for color customization. Whether you prefer classic white, bold colors, or trendy neutrals, you can easily find a shade that complements your kitchen’s style.

Increased Home Value

A freshly painted kitchen can significantly enhance the overall value and appeal of your home, making it more attractive to potential buyers if you decide to sell in the future.

Quick Transformation

Painting cabinets is a relatively quick project compared to a full kitchen renovation. With proper preparation and planning, you can give your kitchen a makeover in just a few days.

Step-by-Step Guide to Painting Kitchen Cabinets

Before diving into your cabinet painting project, it’s essential to gather the necessary materials and prepare your workspace. Here’s a step-by-step guide to help you achieve professional-looking results:

Preparation

Remove all cabinet doors, drawers, and hardware. Clean surfaces thoroughly with a degreaser to remove built-up grime and grease. Fill any holes or imperfections with wood filler and sand the surfaces to create a smooth base for painting.

Priming

Apply a high-quality primer to all cabinet surfaces using a brush or roller. Primer helps the paint adhere better and ensures a smoother finish. Be sure to choose a primer suitable for your cabinet material (wood, laminate, etc.).

Painting

Once the primer is dry, it’s time to apply the paint. Use a high-quality paint specifically designed for cabinets to ensure durability and a professional finish. Apply thin, even coats of paint with a brush or roller, following the wood grain for a smooth finish. Allow each coat to dry completely before applying the next one.

Drying and Curing

After painting, allow the cabinets to dry thoroughly according to the paint manufacturer’s instructions. Depending on the type of paint used, this may take anywhere from a few hours to a few days. Once dry, allow the cabinets to cure for at least a week before reattaching doors, drawers, and hardware.

Finishing Touches

Once the cabinets are fully cured, reattach hardware and reinstall cabinet doors and drawers. Step back and admire your newly painted kitchen cabinets, enjoying the fresh, updated look they bring to your space.

Tips for Achieving Professional-Looking Results

While painting kitchen cabinets is a relatively straightforward project, attention to detail is key to achieving professional-looking results. Here are some tips to help you along the way:

Choose the Right Paint

Select a high-quality paint specifically formulated for cabinets. Look for paints with a durable finish that resists stains, scratches, and yellowing over time.

Proper Preparation is Key

Take the time to properly clean, sand, and prime your cabinets before painting. This ensures better adhesion and a smoother finish.

Use Quality Tools

Invest in high-quality brushes and rollers to ensure a smooth and even application of paint. Cheap brushes can leave streaks and bristle marks, compromising the final result.

Work in a Well-Ventilated Area

Proper ventilation is essential when painting cabinets to ensure adequate airflow and quick drying times. Open windows and doors or use fans to help expedite the drying process.

Take Your Time

Don’t rush the painting process. Allow each coat of paint to dry completely before applying the next one, and take breaks as needed to avoid fatigue and mistakes.

Consider Professional Help if Needed

If you’re unsure about tackling the project yourself or want guaranteed professional results, consider hiring a professional painter or cabinet refinishing company. While this may incur additional costs, it can save you time and ensure a flawless finish.

In conclusion, painting kitchen cabinets is a budget-friendly way to update your space and breathe new life into your kitchen. With proper preparation, quality materials, and attention to detail, you can achieve professional-looking results without breaking the bank. So, roll up your sleeves, gather your supplies, and get ready to transform your kitchen into the stylish and inviting space you’ve always dreamed of.

What is So Great About Chalk Paint?

chalk paint

There are many benefits to chalk paint. It’s versatile, easy to apply, and rarely needs priming. It dries quickly and requires only two to three coats. It is available in many different brands and can be left matte or waxed for a satin look. There are also special brushes for chalk paint, so you can apply it to a variety of surfaces.

Easy to apply

If you’re looking for an easy way to update your furniture, chalk paint might be the answer. This type of paint is easy to apply and dries quickly. To achieve a smooth finish, use long sweeping strokes and thin the paint slightly with water. It will go on smoother if you repeat the process with a second coat.

It’s best to prepare wood furniture before applying paint, however. If there are any chips, cracks, or uneven surfaces, they could hinder the application of the paint. Sanding beforehand will give you a cleaner look. Also, if the wood furniture has a stain, chalk paint may bleed through the stain. If this happens, use a stain-blocking primer first.

Chalk Paint is Easy to clean

There are a variety of different ways to clean chalk paint. Some of them are natural and will not damage the sealant. Others are commercial cleaners that are harsher. It is important to read the labels of these products to ensure they will not damage the paint. These tips will help you clean your paint furniture easily and safely.

Before you begin, shake the paint thoroughly. If the paint is too thick, add water to thin it. Make sure the surface is smooth. You can use a chalk brush or a sprayer, but the best option is to use a natural bristle brush. Over time, brush bristles can become stiff and tacky, so it is important to clean your brush thoroughly. You can also use mineral spirits or warm water to clean the brush.

Durable

Durable chalk paint is an excellent choice for those who don’t want to spend a fortune on a wax finish. This paint is easy to apply and is very durable. In fact, the finish can last for years. If it becomes too scratched or shabby, simply re-wax the surface. Another option is to apply a layer of varnish or polyurethane, which will enhance the paint’s durability and protect it from scratches.

Durable chalk paint finishes are made for a variety of applications. It can be applied using a foam brush to achieve a matte finish. Then, once the paint has dried, you can add a final layer of wax or other protective product to give the finished product a smooth and protective finish.

Chalk Paint is Eco-friendly

Eco-friendly chalk paint is an eco-friendly alternative to traditional paint. It can be used on a variety of surfaces, including wood. Unlike traditional chalk paint, eco-friendly chalk paint contains zero VOC ingredients and offers several benefits. For instance, it is environmentally friendly and ideal for rooms with high humidity. It is also extremely cost-effective. Eco-friendly chalk paint comes in a variety of colors and can be applied easily and quickly.

Due to its water-based formula and low VOCs, eco-friendly chalk paint is an excellent choice for painting indoors. Most brands of chalk paint contain ingredients that are safe for indoor use, including lime, milk protein, and pigments. Others, however, use more toxic ingredients in proprietary formulations.

Resistant to scratches and scuffs

Resistant to scratches and scaffs is a feature that helps protect surfaces from damage. In some cases, this feature is called “abrasion resistant,” and is often combined with other coating technologies to enhance these benefits. For example, an anti-scratch coating will prevent scratches on a screen and help keep images crisp.

The terms scratch-proof and scratch resistant are sometimes used interchangeably, but scratch-proof has more durability. Scratch-proof means that the product is resistant to abrasion, while scratch-resistant means that it can resist minor scratches. The difference between scratch-proof and scratch resistant is often minor and unnoticeable to consumers.

Scratch-resistant coatings are available in many forms. One option is automotive-grade silicone. This type of material is suitable for interior and exterior applications since it is resistant to scratches. In addition to its scratch-resistant properties, it is also flame-retardant, flame-retardant, and non-tacky.

Best Way to Paint Already Painted Walls

If you need to paint already painted walls you need to repaint them, you may have not touched them in a while, so you may need to fill in holes and fix any stains before painting. You may want to use a primer and cover any holes with a patching compound before painting over them.

Primer

While primer is the best way to paint already painted walls, not all paints are suitable for this task. Some paints will require several coats, while others are suitable for one or two coats. Before painting, ensure that your wall is clean, smooth, and free of greasy spots. You can also clean the surface with a damp cloth.

To apply primer, prepare the wall surface by sanding it with very fine grit sandpaper. Then follow the manufacturer’s guidelines on the side of the can. After sanding, wipe the wall with a damp cloth or sponge. Allow the surface to dry before applying the second coat of paint.

If you have stains on your wall, you may need to prime it before painting. This will prevent the stains from coming through the paint, as the primer will act as a sealant.

paint already painted walls

Filling in holes and cracks

Before you start painting, you should make sure your walls are free of any cracks and holes. You will notice that paint cannot cover up these imperfections, so you should fix them before you apply the new paint. Luckily, repairing holes and cracks is not a difficult process and can even be done by a beginner. First, scrape off any loose material. If the crack is too big to fill with paint, you can use a filling knife. Next, cut an inverted V-shaped groove in the crack and fill it with filler.

The process of filling holes and cracks in already-painted walls is the same as when you paint a new wall. Before applying a patch, clean and dry the area thoroughly. If the cracks are shallow, you can use a small amount of concrete patching. Make sure to undercut the holes to give the concrete a better adhesive bond. After filling the hole, make sure that the texture of the patching material matches the texture of the surrounding walls.

To repair larger cracks and holes, you can either use spackle or joint compound. Both types of filler will work. For large cracks, you may want to use steel wool to pack the holes before applying the joint compound. A layer of newspaper will also help cover up any imperfections in the drywall.

Painting over a wall that hasn’t been touched up in a while

The first step to painting over a wall that hasn’t had a fresh coat of paint is to prepare the surface. A clean surface will make the paint adhere better. Make sure that you’ve removed all of the dust and dirt from the area. Sandpaper can also help remove raised sections from the wall. If you have nicks in the wall, you can fill them with spackling compounds.

When painting touch-ups, start from the center of the area and feather outward. Then let the area dry before you decorate. If you’re unsure about the exact shade of the original paint, consider hiring a professional painter to match it. A professional painter will be able to match the color of your original paint or repaint the whole wall to bring the area back to its original look.